Mounting volumes is one of the most fundamental yet powerful concepts in Linux system administration. Whether you're attaching a USB drive, expanding storage with additional disks, or mounting a remote file system over the network, mastering mounting will make you far more effective as a Linux user or administrator.
In this guide, we'll go from the basics of mounting to advanced use cases with clear code samples and scenarios.
What is Mounting?
In Linux, everything is treated as a file. Instead of drive letters like C: or D: (Windows style), Linux integrates storage devices into a single unified directory tree.
A mount point is simply a directory where the contents of a device or filesystem will be made accessible.
Example: Mounting a USB stick at /mnt/usb means all files on that USB will appear inside that directory.
Basics of Mounting a Volume
Step 1: Identify the device
Use the lsblk command to list all block devices:
lsblk
Output example:
NAME   MAJ:MIN RM  SIZE RO TYPE MOUNTPOINTS
sda      8:0    0  100G  0 disk
└─sda1   8:1    0  100G  0 part /
sdb      8:16   0   20G  0 disk
Here, sdb is our new disk with no partitions mounted.
Step 2: Create a filesystem
Before mounting, we must format the disk:
sudo mkfs.ext4 /dev/sdb
This formats the disk with the EXT4 filesystem.
Step 3: Create a mount point
A directory where the disk will be mounted:
sudo mkdir /mnt/data
Step 4: Mount the device
Now attach the disk to the directory:
sudo mount /dev/sdb /mnt/data
Check if mounted:
df -h | grep /mnt/data
Step 5: Make it persistent (important!)
Mounts done manually disappear after a reboot. To persist, edit /etc/fstab:
sudo nano /etc/fstab
Add:
/dev/sdb /mnt/data ext4 defaults 0 0
Run:
sudo mount -a
Advanced Mounting Techniques
1. Mounting with Options
You can control how a volume behaves using mount options.
Read-only mount:
sudo mount -o ro /dev/sdb /mnt/data
No-execute (security):
sudo mount -o noexec /dev/sdb /mnt/data
User mount (allow non-root users):
Add in /etc/fstab:
/dev/sdb /mnt/data ext4 defaults,user 0 0
2. Mounting ISO Files
You don't need to burn an ISO to access its contents:
sudo mkdir /mnt/isosudo mount -o loop ubuntu.iso /mnt/iso
Now the ISO contents are accessible in /mnt/iso.
3. Mounting Network Volumes
Linux supports mounting remote filesystems.
a) NFS (Unix-style sharing):
sudo mount -t nfs server:/share /mnt/nfs
b) CIFS/SMB (Windows shares):
sudo mount -t cifs -o username=user,password=pass //server/share /mnt/smb
4. Bind Mounts
Bind mounts allow you to mount one directory to another.
Example:
sudo mount --bind /var/log /mnt/logs
Now /mnt/logs shows the same content as /var/log.
This is useful for chroot environments or containerized apps.
5. Automount with systemd
Instead of static /etc/fstab, use systemd automount.
Create a unit file /etc/systemd/system/mnt-data.mount:
[Unit]Description=Mount Data Disk[Mount]What=/dev/sdbWhere=/mnt/dataType=ext4Options=defaults[Install]WantedBy=multi-user.target
Enable:
sudo systemctl enable --now mnt-data.mount
Let's take a look at some Practical Scenarios
Scenario 1: Expanding Storage for a Database
You add a new 200GB disk for PostgreSQL data.
Steps:
Format and mount /dev/sdc → /mnt/postgres.
Move existing PostgreSQL data there.
Update /etc/fstab for persistence.
Restart PostgreSQL with new data path.
This ensures the database has dedicated storage, isolated from system files.
Scenario 2: ISO Repository
You maintain multiple Linux ISO files. Instead of extracting them, just loop mount:
for iso in /isos/*.iso; do dir="/mnt/$(basename $iso .iso)" sudo mkdir -p "$dir" sudo mount -o loop "$iso" "$dir"done
Now each ISO is browsable under /mnt/.
Scenario 3: Secure Mounts in Multi-user Environments
On a shared server:
Mount external drives as read-only.
Use noexec, nosuid, nodev to prevent privilege escalation.
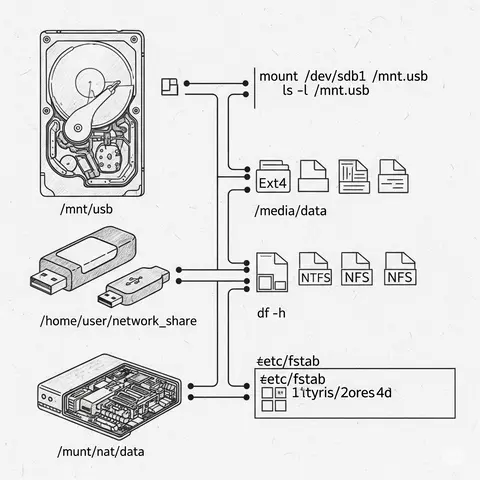
Example diagram of how mounting integrates devices into the Linux filesystem tree:
/├── bin/ (Essential binaries)├── etc/ (Configuration files)├── home/ (User home directories)│ ├── alice/│ └── bob/├── mnt/ (Temporary mount points)│ ├── data/ <-- Mounted disk (/dev/sdb)│ ├── iso/ <-- Mounted ISO file (ubuntu.iso)│ └── nfs/ <-- Mounted remote NFS share├── media/ (Removable devices like USBs/CDs)│ └── usb/ <-- Mounted USB stick (/dev/sdc1)└── var/ (Logs, spool, databases) └── log/
Explanation:
The root / directory is the top of the hierarchy.
Devices like /dev/sdb don’t show up as separate “drives” — they're mounted into the existing tree.
Mount points (e.g., /mnt/data, /mnt/iso) act as portals to access these devices.
This visualization helps beginners see why mounting is different from drive letters in Windows — everything is unified into a single directory tree.
Mounting Tips
Always test new mounts with mount -a before rebooting to avoid boot failures caused by incorrect /etc/fstab entries.
Before You Mount
Identify the Device: Know the device's name. Use commands like lsblk or fdisk -l to list all block devices and their partitions. This helps you confirm the correct device (e.g., /dev/sda1, /dev/nvme0n1p1).
Check the Filesystem: Use the file -sL /dev/device command to check the filesystem type (e.g., ext4, xfs, ntfs) before you mount. This is crucial for selecting the right mount options and driver.
Create a Mount Point: Always create an empty directory to serve as the mount point. Avoid mounting to existing non-empty directories, as this will hide the original content. A good practice is to create a directory under /mnt or /media, such as /mnt/data or /media/usb.
The mount Command
Specify Filesystem Type: While mount can often autodetect the filesystem, it's better to explicitly specify it using the -t option. For example, sudo mount -t ext4 /dev/sda1 /mnt/data. This is especially useful for less common filesystems.
Use Descriptive Mount Points: When dealing with multiple drives, use clear, descriptive names for your mount points (e.g., /mnt/media-backup, /mnt/archive-drive). This makes managing your storage much easier.
Advanced Mounting Tips
Read-Only Mounts: To protect data on a volume from accidental changes, mount it in read-only mode using the -r option. This is great for forensic analysis or simply preventing file modification. Example: sudo mount -r /dev/sda1 /mnt/data.
Permissions and Ownership: If you need specific user access, use mount options like uid and gid to set the owner and group of the mounted filesystem. This is common when mounting filesystems like FAT32 or NTFS, which don't natively support Linux permissions. For example: sudo mount -t vfat -o uid=1000,gid=1000 /dev/sdb1 /media/usb.
Mounting at Boot: For volumes that need to be available every time the system starts, add an entry to the /etc/fstab file. The file uses a specific format: device mount_point filesystem_type options dump pass. Use the device's UUID instead of its name (/dev/sda1) to prevent issues if the device name changes. You can find a device's UUID with blkid.
Loop Devices: To mount an image file (e.g., an ISO or a disk image), use a loop device. This lets you treat a file as if it were a physical disk. The command is sudo mount -o loop /path/to/image.iso /mnt/iso.
Unmounting and Troubleshooting
Check for Open Files: Before unmounting, ensure no processes are using the mounted directory. Use the lsof or fuser -m commands to find and kill processes that are holding the mount point open.
Force Unmount: If a volume can't be unmounted normally, you can try a lazy unmount with umount -l. This detaches the filesystem from the directory tree immediately, but cleans up all references later. This is helpful for network file systems that are no longer accessible.
Troubleshooting: If a mount fails, check the system logs using dmesg or journalctl -xe. The log messages often provide a clear reason for the failure, such as a corrupt filesystem or incorrect mount options.
Summary of Volume Mounting
Becoming proficient with mounting volumes in Linux means:
Understanding mount points and persistence.
Using mount options to control access and security.
Leveraging bind mounts and network mounts for flexibility.
Automating with systemd or /etc/fstab.
With these techniques, you can confidently manage storage in servers, development environments, and production systems.
 grafana