 nikto
niktoNikto Web Scanner Explained: A Practical Guide for Security Teams
An in-depth guide to the Nikto web vulnerability scanner—how it works, what it detects, limitations, and how security teams can use it responsibly.
Jan 14, 2026Tools
Safety first. Port scanning can be intrusive and is regulated: only scan systems and networks you own or have explicit authorization to test. Misuse can be illegal and unethical. This article explains how to use
nmapfor legitimate security testing and how to make scans less noisy for operational reasons (avoid disrupting services, reduce false positives in monitoring). It does not endorse unauthorized access. Check our Practice page for more information abot safe environments.
Port scanning is the process of probing a host or range of hosts to discover which TCP and UDP ports are open, closed, or filtered. nmap is the go-to open-source tool for this: flexible, extensible, and well documented. This guide explains how to:
nmap command examples,-p 1-65535 or -p- (the latter means "all TCP ports").-p- but UDP scanning is slower and less reliable.Replace
targetbelow with a single IP, a hostname, or a CIDR range (e.g.,192.0.2.0/24). Always get permission. If you would like to practice do it in safe environments, check our Practice page for more information.
A straightforward, always-works TCP scan using the OS network stack:
nmap -sT -p- target-sT — TCP connect() scan (no raw packets; uses OS connect). Works without elevated privileges.-p- — scan ports 1–65535.sudo nmap -sS -p- target-sS — SYN scan (sends SYN, waits for SYN/ACK). Requires raw sockets (root/Administrator).sudo nmap -sU -p- target-sU — UDP scan. Much slower; UDP is connectionless so nmap sends probes and waits for ICMP or UDP responses. Expect long runtimes for full port ranges.sudo nmap -sS -sU -p- targetsudo nmap -sS -sU -p- -sV -A --version-intensity 5 target-sV — service/version detection.-A — aggressive: OS detection, version detection, script scanning, traceroute.-A and NSE scripts can be intrusive; avoid on production systems without permission.nmap relies on ICMP unreachable responses to mark closed.--top-ports N or --top-ports 1000 to scan the most common UDP ports first.--host-timeout, --max-retries.Example: scan top 200 UDP ports first:
sudo nmap -sU --top-ports 200 -sV targetImportant: “quiet” here means less likely to overload the target and less likely to trigger noisy alert thresholds. It is not a guarantee of stealth, and network defenders can still see and log scanning. Always test with authorization (get written permission before scanning).
Use timing templates (-T0 to -T5). Lower numbers are slower/more polite.
-T0 or -T1 are the slowest (polite), -T4/-T5 are fast/noisy.
sudo nmap -sS -p- -T1 target--min-rate / --max-rate (set low to be gentle).--min-parallelism / --max-parallelism.--scan-delay <time> introduces a delay between probes to reduce burstiness:
sudo nmap -sS -p- --scan-delay 200ms -T2 targetAlternatively, use --min-rate 10 to enforce a low continuous rate.
--randomize-hosts shuffles target order for ranges; spreads load over time and reduces banked bursts.
nmap -p- --randomize-hosts --min-rate 20 192.0.2.0/24--top-ports 1000 (most common ports),-p 1-1024,1433,3306,8000-8100).Using -Pn (skip host discovery/ping) avoids noisy ICMP/ARP pings but will cause Nmap to probe every host you list — which can be more intrusive. Use when you know hosts are up.
sudo nmap -sS -p- -T2 -Pn target-A or heavy NSE scripts unless needed. Use targeted scripts instead: --script banner rather than --script vuln.sudo nmap -sS -p- -T2 --scan-delay 150ms --min-rate 20 --max-retries 2 -sV --version-intensity 2 targetThis balances thoroughness and gentleness: SYN scan of all ports, modest version checks, low timing.
--top-ports for both families to triage:
sudo nmap -sS --top-ports 1000 targetsudo nmap -sU --top-ports 200 target-p- UDP scans for when you must and when you have patience and permission.Use -oA <basename> to save nmap output in all formats:
sudo nmap -sS -p- -sV -oA scan-results targetscan-results.nmap, .xml, and .gnmap are produced for detailed reporting and parsing.
If you're planning scans as an admin, it's also useful to know how defenders detect them:
If you are defending a network, tune your IDS to differentiate benign scheduled scans (authorized) from malicious ones by organizing internal scanning programs and whitelisting authorized scan sources.
--top-ports to identify quick wins.-T1/-T2), --scan-delay, and low rates when scanning production.-A on production without permission.-oA for reporting and repeatability.Scan all TCP ports (SYN):
sudo nmap -sS -p- targetScan top 1000 TCP ports, version detect:
sudo nmap -sS --top-ports 1000 -sV targetScan selected UDP ports (top 200) with version detection:
sudo nmap -sU --top-ports 200 -sV targetPolite full TCP scan (slower, gentler):
sudo nmap -sS -p- -T1 --scan-delay 200ms --min-rate 10 -sV targetSave all output formats:
sudo nmap -sS -p- -sV -oA all-ports-scan targetnmap is powerful. Use it responsibly:
Love it? Share this article:
niktoNikto Web Scanner Explained: A Practical Guide for Security Teams
An in-depth guide to the Nikto web vulnerability scanner—how it works, what it detects, limitations, and how security teams can use it responsibly.
Jan 14, 2026Tools
 penetration testing
Hydra: A Powerful Penetration Testing Tool for Password Cracking
An in-depth article exploring THC-Hydra, its features, usage, and ethical applications in penetration testing.
Dec 7, 2025Tools
 network security
Network Segmentation in Shared Office Environments
Learn how to design and implement network segmentation in shared business centers, ensuring isolation, compliance, and operational efficiency across multiple companies under one roof.
Oct 27, 2025Networking
 penetration testing
Penetration Testing Cheat Sheet
A concise, step-by-step cheat sheet for penetration testers — methodology, common attacks and checks for each phase, tools to consider, and quick defensive notes. Intended as a checklist during authorized engagements.
Oct 13, 2025Cybersecurity
 iptables
Understanding iptables: The Linux Firewall Tool
Learn how iptables works, explore practical firewall rules, and discover real-world scenarios where iptables strengthens Linux security.
Sep 17, 2025Tools
 DMZ
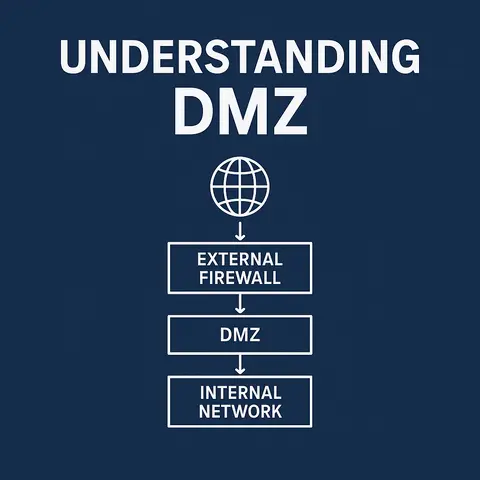
DMZUnderstanding DMZ: A Key Security Layer in Network Architecture
Learn what a DMZ (Demilitarized Zone) is in networking, why it's important, and how real-world scenarios help secure IT environments.
Sep 17, 2025Networking
 DHCP
DHCPUnderstanding DHCP in Cybersecurity
A deep dive into Dynamic Host Configuration Protocol (DHCP), its role in networking, and how attackers and defenders approach it. Includes red and blue team perspectives with practical examples.
Sep 9, 2025Networking
 DDoS
DDoSDNS Amplification Attacks: The Magnifying Glass of DDoS
Learn how DNS amplification attacks weaponize open DNS resolvers to flood a victim's network. This article details the attack mechanics and provides crucial blue team strategies, including ingress filtering and DNS hardening, to defend against this powerful form of DDoS.
Aug 21, 2025Networking